Lets create a New class dictionary. The DEMDRAW program automatically starts with a new drawing canvas whenever the program is executed.
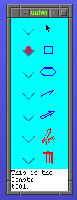
First, an object, either concrete or alternative, must be selected in the Object Toolbar. For this example, I shall choose the Concrete Class represented by a square.
Now lets put the concrete class object on the drawing canvas.
Find a place on the canvas where you would like to put the object.
Click the mouse button and a dialogue box will appear asking you for a name for that object. 
The same technique is used for alternaion classes. Just make sure the appropriate icon is selected in the object toolbar.
First, select the single arrow which represents a construction edge in the Object Toolbar.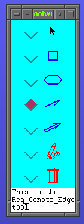
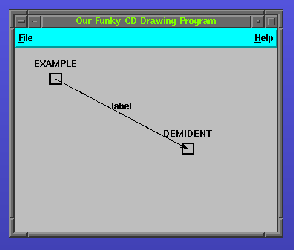
Then click on the first node of the class dictionary while at the same time of dragging to the other node to be connected. The node will turn a yellow color when it has been recognized by the edge tool. Then like before with objects, the edge needs a label. Give the edge a label and now the two nodes will be connected.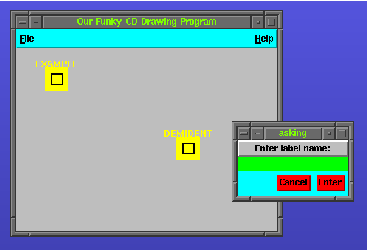
The same will hold true for adding alternation edges from an alternation class.
Just repeat these processes over and over and eventually the end result will be your own customized class dictionary.
The features of the DEMDRAW program allows you to rearrange the objects on the drawing canvas or delete objects as well. Lets first look at the ability to move objects.
Make sure that the selector tool is selected on the Object Toolbar. Then highlight the object which you wish to move to another area of the drawing canvas. The object will turn a green color when it is properly highlighted. This means you can now move the object. So click and drag the object to its new location and the object will follow with all attached vertices.
For an example, lets move the EXAMPLE object in the downward direction. Our ending result is what follows:
Other option is to delete objects. To delete an object or an edge, you must first select the delete tool from the object toolbar represented by a trashcan. 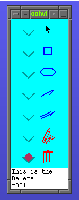
Again, the object will be highlighted when it is selected, but this time the highlight color will be red. Then just click the mouse button and a prompt will appear according to the object selected. For example, here is the prompt for an edge to be deleted. 
REMEMBER: IF AN OBJECT IS DELETED, SO WILL BE ANY ATTACHED EDGES.


